Our Subversion Workflow
· James
More often than not engineers here at Realmac Software work in teams to develop an app. Regardless of whether you’re also in a team, or a solo engineer, on a day–to–day basis you should be using a version control system.
Version Control Systems
There are numerous version control systems available, the two we use are Apache Subversion (SVN) and Git. We remain objective when deciding which system to use for a project, we need to make sure that the the chosen system meets our requirements. Of course these requirements can change over time, as well as the systems themselves. There had been discussions in the past about moving from SVN to Git for Ember but migrating takes time and effort and it’s not something that should be done without due consideration. We felt that the investment needed to perform the migration would not have resulted in sufficient benefit. We would have needed to account for the relationships that tie our SVN commits to other elements such as commit comments on Beanstalk, tickets on Lighthouse and customer support issues on Freshdesk. Additionally our shared code would need to be stored in a version control system which can be pulled into both SVN and Git working copies. When we start a new project we will evaluate again what version control system best suits our project requirements.
Working on Ember with SVN
As Damien and myself are working on Ember we receive new tickets of work on Lighthouse. For each new ticket, or unit of work, we’ll create an SVN branch. Creating, merging and reintegrating these branches is quick and easy, especially when using remote branches. I’ve outlined some steps on how you can get started with SVN branching.
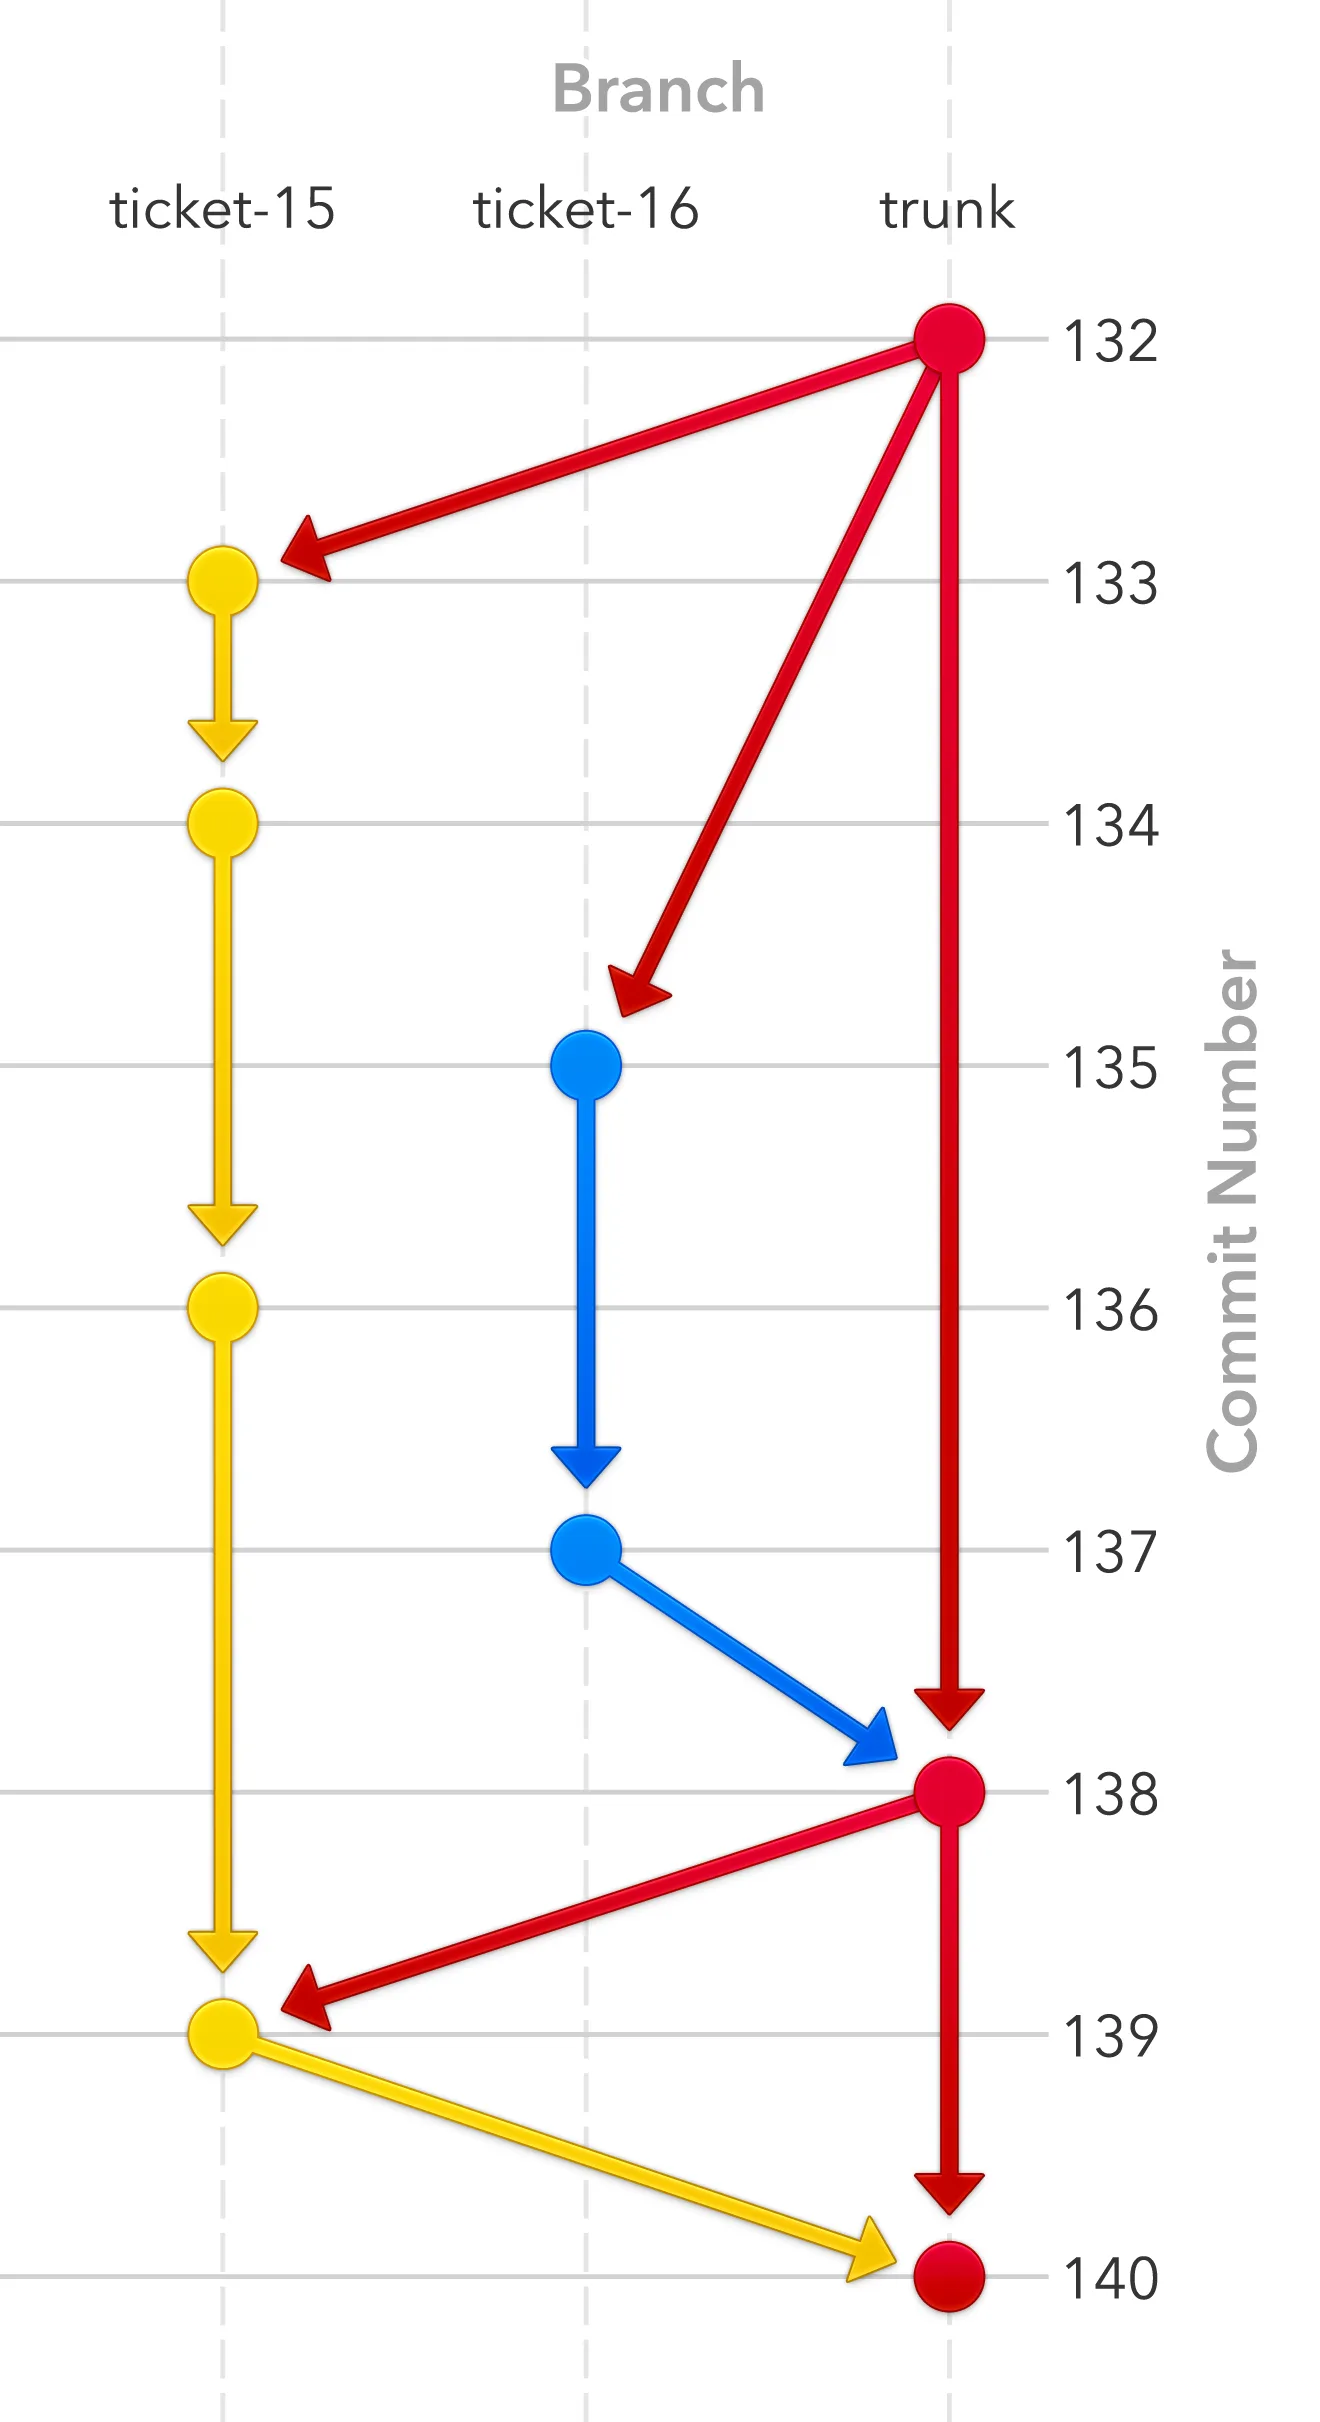
Creating a Remote Branch
Using a Terminal window change in to the trunk or branch that you’ll want to be branching from. Now first ensure the branch is up-to-date by running svn update and then run svn info so you can view the revision number.
Revision: 132
Now to create the new branch run the following, changing @132 to your revision number and setting your own relevant branch name and commit message. Note: the following implies our own folder structure and yours could well be different.
svn copy ^/application/branches/trunk@132 ^/application/branches/ticket-15 -m "New branch for ticket #15"
The new branch is created remotely on the server and will return quickly. Now to duplicate the directory locally on your machine run the following.
ditto ./ ../ticket-15
And now change it to that directory with.
cd ../ticket-15
If you run svn info again you will see.
URL: [YOUR URL]/application/branches/trunk
There is an issue where the URL for the ticket-15 branch is pointing to the trunk branch. This is simply because the trunk directory was duplicated locally. It’s simple to fix and just requires switching the branch to point to the correct URL.
svn switch ^/application/branches/ticket-15 --ignore-externals
Now run svn info again and you should see.
URL: [YOUR URL]/application/branches/ticket-15
That’s it, your new branch is ready. So to quickly recap, we created a remote branch, duplicated our local branch and then switched it to point to the new remote branch. We’ve performed this with little network overhead and no need to download a full copy of our trunk.
Merging in Others’ Work
As you work on your new branch other team members may have made changes or merged in changes to the trunk that you’d like, or need, to have in your branch. You can use the following steps to merge in changes from other branches.
Use Terminal to change in to the directory of the branch you’re working on. Now to merge in the changes from trunk run the following.
svn merge ^/application/branches/trunk
This performs a synchronise merge, with your branch catching up to the tip of the branch you’re merging in. After the merge you can commit the changes that have been applied.
svn commit -m "Synchronise with trunk"
Reintegrating Our Work
Once you’re finished working on your branch you’ll want to reintegrate the changes back in to trunk. First you should synchronise merge the trunk in to your branch using the steps above. This gives you an opportunity to resolve any conflicts and help make your reintegration more concise. Before you reintegrate ensure the two branches you will be using are in a clean state.
In Terminal change in to the directory of the trunk or branch that you want to reintegrate your work in to and perform an svn update. Now you can reintegrate your working branch by running.
svn merge --reintegrate ^/application/branches/ticket-15@139
The reintegrate merges all the changes unique to the branch you’re merging, not just since the last synchronise merge to that branch. You can now review the changes locally, resolve any conflicts, build and test.
When you are happy with merge you can commit the changes that were made.
svn commit -m "Reintegrate the ticket #15 branch in to trunk"
And finally delete the branch that you reintegrated.
svn delete ^/application/branches/ticket-15 -m "Delete the ticket #15 branch"
There is one caveat to bare in mind with reintegrating and deleting the branch, essentially there is a race condition between the two. If another developer were to make additional commits after you have reintegrated the branch then these will be missing. It’s worth checking the commit log after deleting the branch to ensure that this hasn’t happened or, better still, use locking.
I hope this introduction to SVN remote branches has been helpful and if you’ve any questions you can catch me on Twitter or leave a comment below.